Timeliner
Mark a track’s cues by ear. Load audio, hit play, tap markers in time with the music — then decide what they mean afterwards. Exports to Titan, grandMA3, d3, After Effects, Reaper and CSV.
Overview
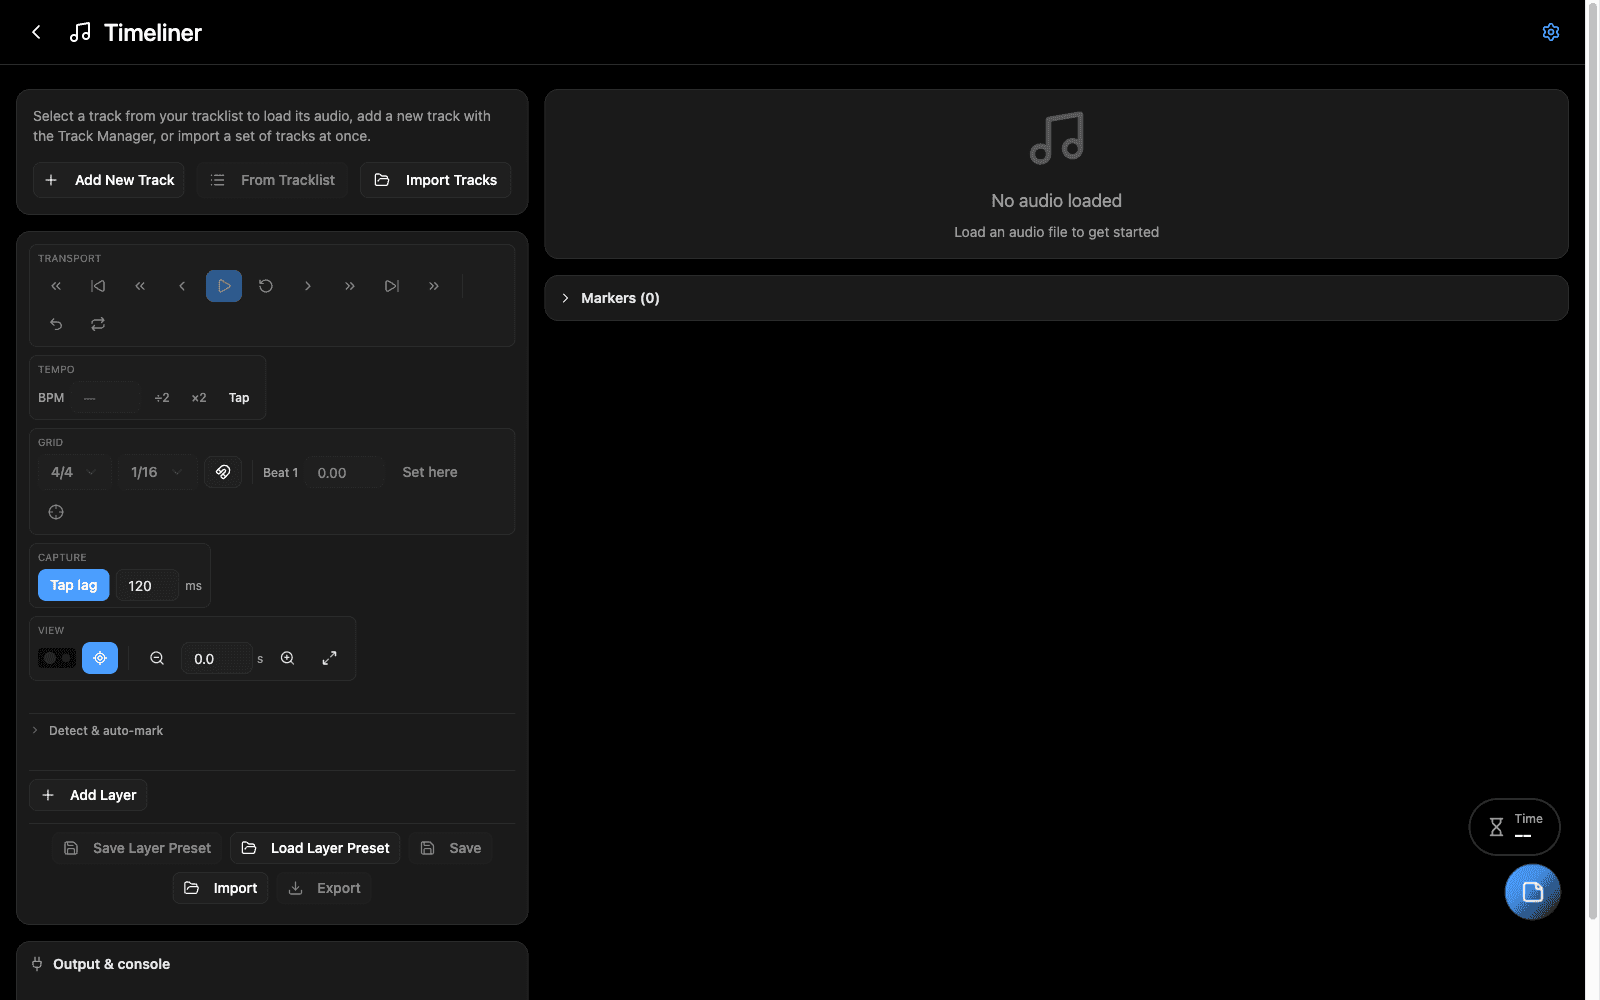
Timeliner turns a piece of music into a timed cue list. You load a track, mark the moments that matter, organise those marks into layers, and export something your console can read.
The design principle is capture first, decide later. Most cue-marking tools make you name a marker at the moment you create it, which means you stop listening in order to type. Timeliner never interrupts you: a marker gets an automatic name, and you rename, re-layer or delete it once the pass is done.
It handles:
- Live tapping — number keys drop markers onto layers while the track plays
- Multi-layer cues — strobes, blackouts, pyro and camera hits captured in one listen
- Automatic detection — hits, drops, builds, half/double-time sections, or markers placed straight from the tempo grid
- A real beat grid — time signatures including 6/8 and 7/8, subdivisions down to 1/32
- LTC timecode generation — music on one channel, timecode on the other
- Set import — a whole Reaper session or a folder of delivered tracks in one pass
- Multi-bus playback — music, click and cues on separate faders, out separate outputs
- Six export targets — Avolites Titan, grandMA3, d3, After Effects, Reaper, CSV
- Sending straight to an Avolites console — no file, and a second send updates rather than duplicates
- Re-ingest — swap a re-delivered track’s audio without losing its markers
When to Use
Reach for Timeliner when:
- A song needs cues marked to the beat and you want to do it by listening, not by dragging
- You’re building a timecoded show and the marks need to reference show time
- An artist sent stems and you need to find every hit before programming
- You want a bar-accurate grid to cut against, in any time signature
- An artist or musical director has handed over a whole set and you need it in Prismatik before you can start
Use Lineup for running order and set structure — Timeliner works inside a single track. Use Timecode Tool for timecode arithmetic, and Timecode Reader for decoding LTC off a file.
Step-by-Step
- Pick a track. Select one from your setlist, or add a track and attach an audio file. Attaching audio analyses it for tempo.
- Check the tempo. Detection is good but not infallible. If the grid drifts against the music, use ÷2, ×2, the alternates dropdown, or Tap — tap the button in time and it averages your taps.
- Set the time signature. 4/4 is the default. 6/8 and 7/8 move the bar lines to where you’d count them.
- Anchor beat 1. Press Align to first beat, or park the playhead on the downbeat and press Set here. Everything downstream — snapping, quantizing, the beat light — is measured from this, so it’s worth getting right.
- Add layers for each cue type: Strobes, Blackout, Pyro, Camera. The first nine get number keys.
- Play and tap.
Spacestarts playback. Press1–9to drop a marker on that layer,0for Global. Hold a key instead of tapping to create a marker that lasts as long as you hold it — useful for builds and sustained looks. - Tidy up. Open the Markers drawer to rename, re-layer or bulk-move. Select several and move them all at once.
- Export. Choose your console format and save.
Finding a track
The track picker searches as you type — name, BPM, timecode or length, so
18:35 finds the song in that slot and 128 finds the one at that tempo. Sort
by any of them, either direction. A plain dropdown stops being usable somewhere
around thirty tracks, and a set is often forty.
Switching tracks with unsaved markers
Loading a track replaces the timeline with that track’s saved data. If the one you are leaving has markers that were never saved, Prismatik stops and tells you how many:
- Stay here — nothing changes.
- Save and switch — the markers go onto the track, then it loads the next.
- Discard and switch — the unsaved ones are dropped. What was already saved stays.
There is no option that loses work by accident, and the default is the one that keeps it.
When a client re-delivers
Material changes after you have marked it. The client moves a song’s timecode, re-cuts the head, or starts sending music and LTC as one file after a week of sending two. Neither of the tools below makes you mark it again.
Re-ingesting one track
Re-ingest audio, under the track selector, replaces the audio and keeps the markers.
It reads the new file first, decodes its timecode, and shows what actually changes — file, length, start timecode, frame rate, which side the timecode is on — before anything is written.
Then it asks the one question it cannot work out for itself: where should the markers go?
- Stay where they are in the music — the same take, re-bounced or re-labelled. Your marks are still on their beats, and every exported time moves with the new timecode. This is the common one.
- Stay at the same timecode — the head was re-cut and the start timecode moved with it, so the music did not move on the show clock even though it moved in the file.
Each option shows where your first marker lands, which settles it faster than the descriptions do. If the wrong one is chosen it is obvious: markers get pushed off the front of the file and it says so.
Markers that fall outside a shorter delivery are reported, never quietly dropped — a bounce that came back short is usually a mistake in the delivery.
Re-delivering the whole set
Point Import Tracks at the folder again. Prismatik diffs it against the show and tells you which file is which track, what differs, what is genuinely new, and which tracks that folder no longer contains.
Matched tracks keep their markers, titles and place in the running order — only the audio and its timecode change.
Matching is ranked and says how sure it is: same filename, same name and length, same name, or same start timecode and length. Anything short of certain is flagged, because a wrong pairing puts one song’s audio under another song’s markers. Tracks the folder no longer has are listed and left alone.
Markers follow one rule for the whole batch — the same choice as above. A client does the same thing to every file, and answering it forty times is not a workflow.
Importing a set
Import Tracks on the opening screen brings in a whole set at once, from either of the two ways material actually arrives.
From a Reaper session
Point it at a .RPP and it reads the session the way you would: each region
becomes a track, the marker lanes become cue layers, and the tempo map gives
each song its own BPM.
Timecode comes from the session’s own timecode track — a few seconds are decoded at each song’s start rather than reading the whole file, so a 90-minute set scans in seconds.
This also solves the long-file problem. A 72-minute session is never loaded as one timeline; it becomes fifteen tracks of three to ten minutes, each comfortably inside what the tool handles.
From a folder of tracks
Point it at a folder and it reads each file: title from the filename, duration from the header, and the start timecode decoded straight out of the audio. Sixty files is normal for a tour and takes about a minute.
Both channels are probed and whichever carries LTC wins — do not assume it is the right one. The channel carrying timecode is recorded on the track so playback mutes that ear instead of buzzing in it.
The steps
- Choose a source — a session or a folder.
- Review findings. When the whole set agrees on channel, frame rate and start times, this collapses to a single line. When it does not, the disagreement is what you see.
- Assign the stems (sessions only). Give each track of the session a role — music, click, cues, aux, or skip — and a quality. Roles are how the buses are controlled later, not a mixdown instruction: assigned tracks stay separate.
- Place the markers (when there are any). Each detected group becomes a layer you can rename, recolour or leave behind.
- Confirm. Every field is editable before anything is written. Rows with something worth a look carry a warning icon; hover it. You can also arrange the imported tracks into a setlist here — they join your tracklist either way, but a setlist puts them in running order and leaves out anything you unticked.
A word on stems
The wizard does not sum the tracks you assign to music. In a production session the extra mixes are usually stems of the full one rather than parts that add up to it, so summing them doubles the music — and nothing in the file says which kind you have. Keeping them separate means you can hear it in seconds and mute what you do not want.
Click and cues default to mono at 22kHz. That is inaudible for their purpose and roughly a fifth of the memory: about 150MB a song rather than 366MB. The wizard shows the cost of each choice as you make it.
The mixer
A track with more than one bus gets a Mixer button. Each bus has mute, solo and a level, all live while playing.
Solo selects and mute silences, and mute wins when both apply — soloing something never quietly un-mutes it. Several buses can be soloed at once, which is how you check a click against the music.
Sending buses to separate outputs
Pick an output device in the mixer and Timeliner reports how many channels it offers. Beyond a stereo pair, each bus gets numbered buttons for the channels it feeds — a stereo music mix out 1/2, click out 3, timecode out 5.
Sending a stereo bus to a single channel folds it to mono properly rather than dropping a side. The patch is remembered per machine rather than in the show file: it describes your rig, and a show opened on a laptop with two outputs should not inherit an eight-channel routing.
Common Workflows
One pass per cue type, or all at once
Because each layer has its own number key, you can capture strobes, blackouts and camera hits in a single listen — or do one pass per layer if a song is dense. Both work; the keys don’t care which layer is selected.
Let detection do the obvious ones
Auto-mark proposes markers and shows them on the waveform before committing anything. Tune the sliders, watch the count, then Add or Cancel. Four modes:
| Mode | Finds |
|---|---|
| Hits | Sharp attacks — individual drum hits and stabs |
| Drops | Drops, builds and breakdowns. Builds and breaks arrive as ranges |
| Feel | Half-time and double-time sections |
| Grid | Markers straight from the tempo — no audio analysis at all |
Grid is usually the fastest way to start. Pick which beats within a bar and which bars within a four-bar phrase, and you get exact placement — beat 1 of every bar, the backbeat, or the top of every phrase. Because it comes from the tempo rather than from listening, it’s exact by construction.
Everything auto-mark creates lands on an Auto layer as ordinary markers, so you can thin them out, move the keepers to a real layer, and delete the rest.
Working a section over and over
Drag across the ruler to paint a loop region, then enable looping. Playback repeats that section while you refine it. Click the ruler without dragging to clear it.
Timecode for the show
Open Timecode & output, enable LTC, and set the frame rate and start offset. Timeliner then plays music on one channel and generates timecode on the other, so a console can chase it.
Exporting
Six targets: Avolites Titan, grandMA3, d3/disguise, After Effects, Reaper and CSV.
Export opens a dialog with everything that decides whether the file is any use, on one screen. Your answers are remembered per show — the same set gets exported to the same console at the same rate over and over, and a house rig on grandMA3 is not the same job as a festival on Titan.
Times: show or zero
A marker’s time is measured from the top of its own track, but a console is chasing show timecode. If the track has an offset — a song starting at 18:50:00:00 — the export carries it.
- Show timecode — the default, and what a console wants.
- From zero — track-relative, for a DAW or a comp that opens the song at zero.
It applies to every format, including After Effects and Reaper, which write seconds rather than timecode.
Frame rate
Timecode frames only mean something at a stated rate. Export at 30fps into a
project running at 25 and every marker drifts — 00:00:20:28 arrives as
21.120s rather than 20.955s.
Set it in the wizard to whatever the console is running. It applies to the export only: the track still plays back here at its own rate, because the same marks may go to a 25fps desk and a 30fps comp.
Layers
Choose which layers to export, or leave them all on. A selection that matches nothing exports the whole track rather than an empty file — so a preference saved before a layer was renamed cannot silently produce nothing.
The whole set at once
Every marked track writes one file per track into a folder you choose. It reads each track’s own markers, so the set does not have to be opened song by song.
Tracks with nothing marked are skipped and counted rather than written as empty files, and two tracks with the same name get distinct filenames instead of overwriting each other.
Titan reads CSV, not XML, and the columns are External ID, Legend, Time — the order Titan’s own import log names. A file with the time first is rejected with “Time in bad format … Expected Format: h’:‘mm’:‘ss’:‘ff”.
Every marker gets its own External ID, because Titan deduplicates on it. A file where several markers share an id imports as one marker per id — which looks like almost nothing arriving.
Sending straight to a console
Exporting produces a file someone has to carry to the desk. For Avolites Titan there is a shorter route: Timecode & output → Send to Titan… writes the markers onto the console’s timelines over the network.
It finds the console, reads its timelines, pairs them to your tracks by name, and sends the whole set. Sending again updates the markers rather than duplicating them, so re-ingesting a re-delivered track and sending again moves only what moved.
See Avolites Titan for setup and the whole workflow.
Reading marker times
The marker list shows times local — from the top of the track, which is how you mark — or global, on the show clock, which is what the console chases. The toggle sits in the Time column and only appears when the track has an offset, since without one the two read identically.
Remote control
A foot switch or a Stream Deck can drop markers while both hands stay on the desk. Press Enable OSC in the toolbar and Timeliner listens on UDP 8000.
The marker addresses mirror the numpad — /prismatik/marker/add/0 is the
global layer, /prismatik/marker/add/1 through /9 are the first nine layers,
and /prismatik/marker/add uses whichever layer is selected. Transport and
mixer commands work too.
See Remote Control (OSC) for every address and Bitfocus Companion setup.
Tips & Shortcuts
| Key | Does |
|---|---|
Space | Play / pause |
1–9 | Marker on that layer — hold for a range |
0 | Marker on the Global layer |
M | Marker on the selected layer |
Q | Toggle snap to grid |
← → | Previous / next beat |
Shift + ← → | Previous / next bar |
Alt + ← → | Nudge the selected marker |
, . | Previous / next marker |
Cmd/Ctrl + Z | Undo |
Delete | Delete selected markers |
Navigation. Cmd/Ctrl + scroll zooms at the pointer, Shift + scroll pans, and middle-drag pans. The bar under the timeline is an overview — drag its middle to pan, drag either end to zoom. Zoom is expressed in seconds on screen, with the bar count beside it.
Tap lag. People tap 80–200ms late against music, consistently. Timeliner subtracts a fixed amount from live taps to compensate. Turn it off if you want raw timing — for rubato or odd meters the assists sometimes hurt more than they help.
The two indicator lights next to the transport flash on marker hits and on the beat. If they aren’t flashing together, your markers are drifting.
Layer tabs. Hover one to see its name, mute it, solo it, or lock it. Solo shows only that layer; lock stops new markers landing there by accident.
Troubleshooting
The grid doesn’t line up with the music. Almost always tempo or phase. Check BPM first — if the grid drifts progressively, the tempo is wrong (try ÷2, ×2 or Tap). If it’s consistently offset but not drifting, beat 1 is wrong — use Align to first beat.
Auto-mark found far too many markers. Lower the sensitivity, or raise the minimum gap so marks can’t crowd together. The rate readout (~62/min) is a better guide than the raw count.
Auto-mark found nothing. Raise the sensitivity. In Grid mode, check a BPM is set — grid markers come from the tempo, so without one there’s nothing to place.
Changing Quantize doesn’t seem to do anything. It should change the faint subdivision lines. If they aren’t visible, zoom in — subdivisions are hidden when they’d be closer than about seven pixels apart.
A long recording won’t load. Timeliner is built for individual songs. Full-set recordings of an hour or more are not supported — split them into songs first.
Imported tracks all show the same BPM
The tempo is being read from the session’s header, which holds one number for the whole project, rather than from its tempo map. Check the songs have different tempos in Reaper itself — if the tempo map was never built, there is nothing to read and detection from the audio is the fallback.
An imported song’s grid drifts near the end
The song changes tempo internally. A track holds one BPM, so only the opening tempo is kept — the import flags this on the row when it happens.
Nothing is audible after an import
Check the mixer. A bus left soloed silences every other one, and the Clear solo button beside the bus list is the way back. Pressing play says so when nothing would be audible.
The routing buttons do not appear
They are only shown when the selected device offers more than two channels, since on a stereo device every bus goes to the same pair. If your interface should be wider than it reports, reselect it in the device list.
Related Tools
- Lineup — running order and set structure; Timeliner works within one track
- Timecode Tool — timecode arithmetic and conversion
- Timecode Reader — decode LTC from a file or live input
- Conductor — playing a whole set back, once the cues are marked
Source
Component: Timeliner
Analysis functions: timeline-analysis
Export formats: timeline-export